Experimenting with LoRa Devices with Meshtastic
Playing with some low cost off-grid devices to see how well they work in a Mesh style messaging application. Meshtastic is an open source, off-grid, decentralised, mesh network built to run on affordable, low-power devices.
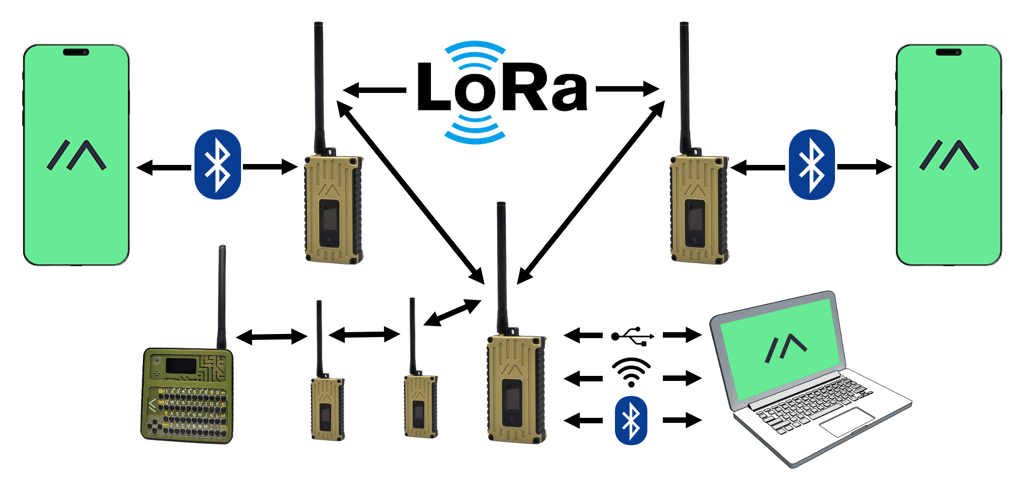
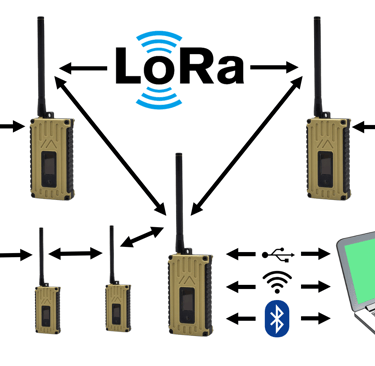
The concept is that the devices use "LoRa" low power radio to communicate in a 'mesh style' network passing data and information with each other to make long range transmission possible.
The devices can be linked via Bluetooth to Computers/Phones where messages could be created and sent over the network to other computers/phones without the use of celluar radio etc. (off-grid)
This Blog post is about getting started with these devices and seeing what can be done as an experiment.
This is a 'Text' Msg operation only. No Voice or Image transfer is currently possible due to bandwidth limitations of the protocol etc.
The normal approach is 'one' device to 'one' user. E.g. users cannot share a device.
What is "LoRa"
The underlying technology, LoRa, is a long range radio protocol available to most regions without requiring additional licensing or certification, like HAM operators.
LoRa (from "long range") is a physical proprietary radio communication technique.
It is based on spread spectrum modulation techniques derived from chirp spread spectrum (CSS) technology.
It also involves LoRaWAN which is the communication protocol and system architecture. LoRaWAN is an official standard of the International Telecommunication Union
More details can be wound in Wiki
What we will be using is based around the Meshtastic Open Source Platform and more details on how it works can be found on there website.
Features
Long range
No phone required for mesh communication
Decentralized communication - no dedicated router required
Encrypted communication
Excellent battery life
Send and receive text messages between members of the mesh
Optional GPS based location features
And more!
What are the devices used ?
RAK Meshtastic Start Kit
Station G1
LILYGO LoRa T3-S3
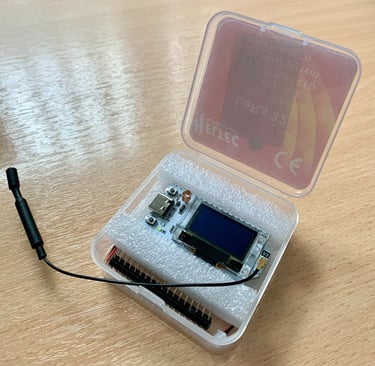
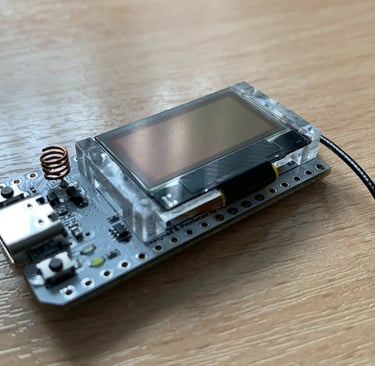
HELTEC LoRa V3 (the one I choose for my experiments) - More details Here (ESP32 based) - UK 863-928Mhz
Meshtastic firmware can be installed on a wide range of development boards. The list below provides a brief comparison of currently supported hardware:

Some devices support built in GPS as well as Temperature, Humidity monitoring together with linking to other hardware for a more comprehensive remote data analysis etc.
The unit comes already loaded with some firmware, which is not quite what we want to use, therefore the first thing to do is wipe the device and load onto it the Meshtastic open source firmware.
To do this you need to power the device and connect it to computer/Mac etc. This done via USB-A(computer) to USB-C(Device) cable which contains both data and power connections.
Windows PC may require Serial Driver to be loaded , but as I was using a Mac it did not need this.
Programming the device with a build of the firmware can be done via a Browser like Chrome etc. (No need to download anything to PC/Mac.)
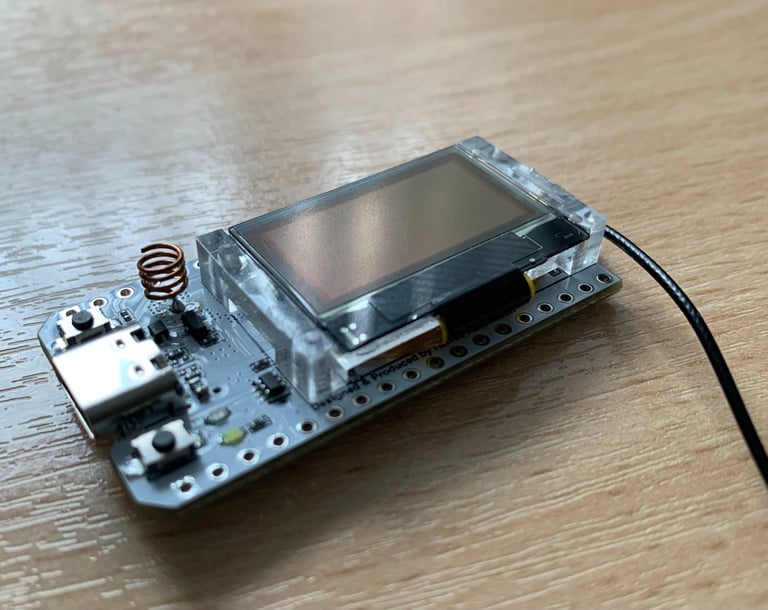
Make sure Not to power the radio on without first attaching the antenna!
You could damage the radio chip!
Plug in the device to the USB port and check that it powers up.
Then goto web site https://flasher.meshtastic.org/ and setup what you want to do from the 3 dropdown lists before you choose serial port to be used and update the device.
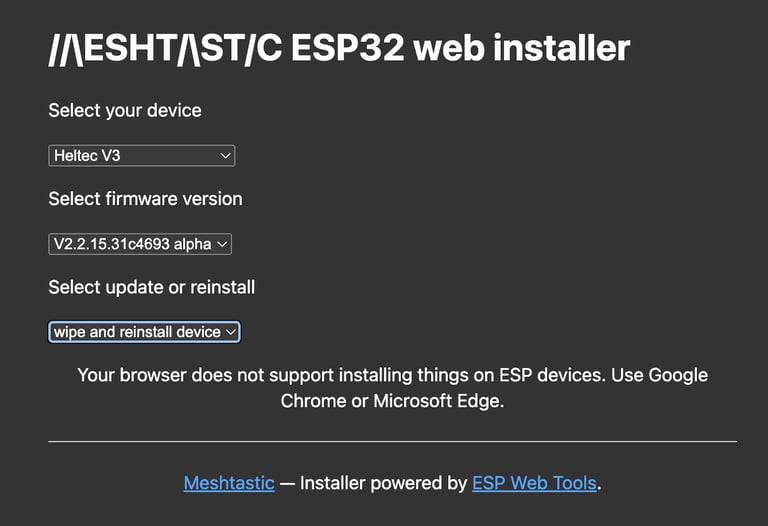
Once completed it will Reboot automatically with the Meshtastic Firmware ready to be linked/configured and connected to a Mobile/Computer via Bluetooth with its own unique identity.
Programming the Firmware
Connecting to the Device for Configuration
You now need to connect the device to the App on the Mobile using Bluetooth.
The display on the device should give you a pairing code reference to get this done.
The App is freely available from the Apple App store in my case. It can be configured with CallSign if required.
Open the App and then connect to the device you are pairing it with. Once paired should be able to change the configuration to setup Frequency band and some other general configurations of the device in order to get it running.
Once this is done and device rebooted that device is ready to go.
Repeat the process for second, third device and bluetooth link to a different phone.
At this point you should be able to send a message from either phone via bluetooth via device via LoRa and across to the second device and it should show up on the second phones App.
In my test case I used an iPhone, iMac and an iPad for the 3 test devices I was experimenting with. e.g. each one was bluetooth linked to its defined device and all configured to run on the same mesh etc.
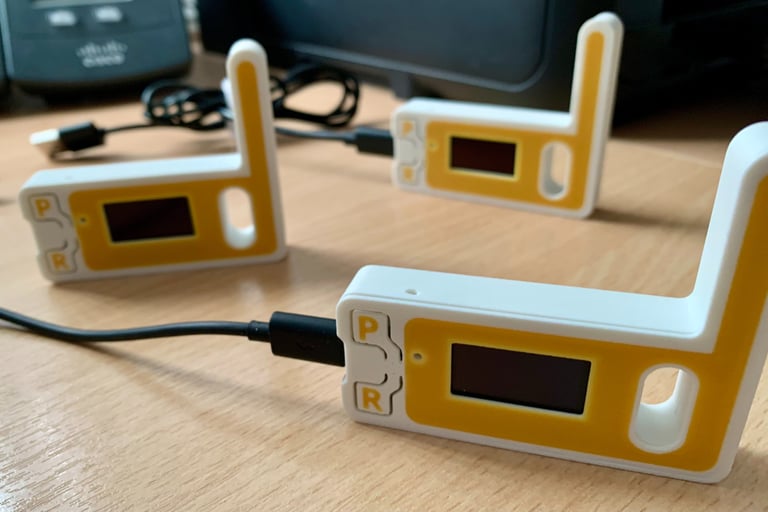
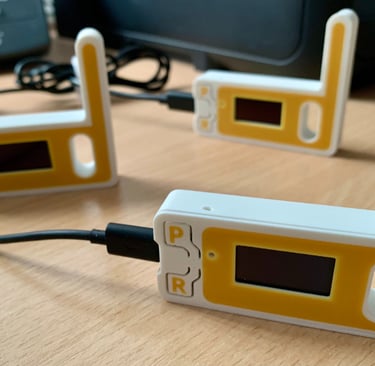

The three test units I purchased did not have GPS on the board, but I did purchase 3D printed cases for them to fit in with the attached antenna.
I powered each one via the USB -C interface connector rather than the on board DC power connector.
The "P" button cycles through the pages of the display and the "R" resets the device and reboots etc.
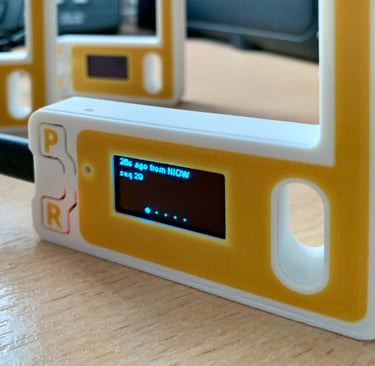
The onboard display provides some basic information related to the status of the device, as well as messages that have been transmitted.
To test send a message from say the iPhone app and the other two should receive it (iPad & iMac in my case.) You can repeat this test from the other two devices to check that all is working correctly.
The apps used provide a lot of configuration adjustment as well as logs of activity and status information from the devices.
Extending Device Reach using the Internet
Having a series of local 'line of sight' devices is great, but what if you want to connect around the world to other devices.
This is where MQTT system comes in.
It is essentially setting up a node which is part of you own local mesh but is also connected to the Meshtastic Server using the Internet. Sort of like using one as a 'hot-spot'.
In my test case I configured one device as a 'Router & Client' and connected it via a serial connection to my Mac to give control and then configured the WiFi connection for Internet access to the Meshtastic Server (using MQTT) which in turn is connected to a lot of other 'bridge' devices etc.
You now are connected a whole load of devices nodes for message transfer, between your local mesh nodes and other equivalent ones connected in a similar way.
You can see the location of the nodes as they connect on the Mapping system which is part of the application/client of the device.
Using Raspberry Pi as a Meshtastic Node in Linux OS
It is possible to utilise a Raspberry Pi as a Meshtastic node.
It requires a radio hat to be added to the GPIO pins of the Pi and then configured via software available on online at GitHub etc.
The details below cover the steps I did to build a setup using an old Raspberry board I had in the overflowing 'things to keep' drawer...
Step 1 - Hardware bits required.
Get your 'spare' raspberry Pi SBC... I intially tried using a 2B model but the codebase from GitHub did not like it :(
so 'upgraded' to a spare 3B to build this experimental kit (running standard 64bit Raspian OS etc.)
Then purchased a GPIO hat for the Pi from Waveshare (went for the model with GPS on board) which is on the list of supported modules for the GitHub codebase. (Details below)
It came with antenna and leads etc. As always make sure antenna is connected to the module before powering up etc.